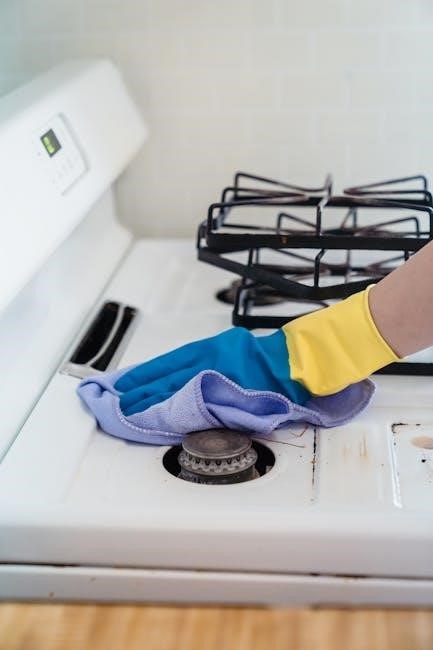
Viking self-cleaning ovens feature advanced pyrolytic technology, using high temperatures to burn food residue, leaving a powdery ash. This process minimizes manual scrubbing, making maintenance convenient and eco-friendly, perfect for modern home cooks.
1.1 Overview of Viking Oven Self-Cleaning Technology
Viking ovens utilize pyrolytic self-cleaning technology, which burns food residue at high temperatures, converting it into ash. This process eliminates tough stains and grime, requiring minimal manual effort. The oven reaches extreme heat during the cycle, ensuring thorough cleaning. A built-in smoke eliminator reduces odors and smoke, enhancing the user experience. After the cycle, a powdery ash remains, which can be easily wiped away. This advanced system makes maintenance efficient and convenient for homeowners, aligning with modern cleaning standards. Always refer to the use and care manual for specific instructions.
The self-cleaning feature of Viking ovens offers numerous benefits, including reduced manual scrubbing and time savings. It effectively removes tough food residue and stains through high-temperature burning, leaving behind only ash. This method is eco-friendly and eliminates the need for harsh chemicals, making it safer for the environment and family use. Additionally, it maintains the oven’s interior cleanliness and hygiene, ensuring optimal performance and longevity. Regular use of this feature keeps your Viking oven in pristine condition with minimal effort and maintenance. Ensure proper ventilation, remove racks and utensils, and protect surrounding surfaces from heat before starting the self-clean cycle for a safe and efficient process.
Proper ventilation is crucial when using the self-clean feature on your Viking oven. Open windows and doors to allow fresh air to circulate, preventing the buildup of harmful fumes. Turn on exhaust fans to help remove smoke and odors effectively. This step ensures a safe environment during the high-temperature cleaning process, minimizing potential health risks and unpleasant odors in your home. Proper airflow also helps the cycle run efficiently, ensuring optimal cleaning results. Always prioritize ventilation for safety and effectiveness. Before initiating the self-clean cycle, remove all oven racks, rack supports, and utensils to prevent damage from high temperatures. This step ensures the oven cavity is clear for optimal cleaning. Gently lift racks and supports, placing them in a safe area for manual cleaning. Avoid leaving any metal or silicone items inside, as they may warp or degrade. Cleaning these parts separately with soap and water ensures they remain in good condition. Always refer to your Viking oven’s manual for specific guidance on removable components. During the self-clean cycle, the oven reaches extreme temperatures, which can damage nearby surfaces. Cover countertops and floors with heat-resistant materials to prevent warping or discoloration. Remove any flammable items, such as curtains or towels, from the vicinity. Ensure the oven door seal is tight to minimize heat escape. Additionally, avoid placing plastic or delicate items near the oven. This precautionary step ensures safety and protects your kitchen from potential damage caused by intense heat. Viking ovens’ self-cleaning feature uses pyrolytic technology, burning food residue at high temperatures, leaving ash for easy cleanup. The smoke eliminator reduces odors, making the 2-4 hour cycle eco-friendly and efficient. Pyrolytic cleaning uses high temperatures to break down food residue into ash. The oven heats to extreme levels, burning off tough stains and grime. This eco-friendly process reduces manual labor, leaving a powdery residue that’s easy to wipe away. The cycle typically lasts 2-4 hours, depending on soil levels, ensuring a thorough cleaning without harsh chemicals. This method is efficient and safe, making oven maintenance straightforward for homeowners. The self-clean cycle duration varies between 2 to 4 hours, depending on the oven model and soil level. Light cleaning may take less time, while heavily soiled ovens require longer cycles. The process ensures thorough burn-off of food residue, producing minimal ash. After completion, allow the oven to cool before wiping down. This efficient cycle makes maintenance hassle-free, ensuring your Viking oven remains in optimal condition with minimal effort. Proper timing ensures a clean and safe cooking environment. The smoke eliminator plays a crucial role in minimizing odors and smoke during the self-clean cycle. By neutralizing fumes produced from burning food residue, it ensures a safer and more pleasant cleaning experience. This feature is especially beneficial for households sensitive to strong smells. The smoke eliminator works seamlessly with high temperatures to reduce airborne particles, making the self-cleaning process more efficient and user-friendly. It enhances overall convenience, allowing users to maintain their oven without dealing with excessive fumes. Before initiating the self-clean cycle, remove oven racks, utensils, and large food spills. Wipe away loose debris with a damp cloth to ensure optimal cleaning efficiency. Before starting the self-clean cycle, remove large food particles and wipe loose debris with a damp cloth. This step prevents excessive smoke and flare-ups during the high-heat cleaning process. Avoid using abrasive cleaners or scrubbers, as they may damage the oven’s interior. Ensure all racks and utensils are removed to allow proper airflow and even heating. For stubborn spots, a mixture of baking soda and water can be applied, but this should be done carefully to avoid interfering with the self-clean function. This preparation ensures optimal cleaning efficiency. When addressing large food spills in your Viking oven, act promptly to prevent them from hardening. For tough spots, apply a mixture of baking soda and water to create a paste, letting it sit for 15 minutes. Gently scrub the area with a non-abrasive pad or sponge, then wipe clean with a damp cloth. Avoid using harsh chemicals or abrasive cleaners, as they can damage the oven’s finish. This method ensures the spill is managed without interfering with the self-cleaning cycle’s effectiveness later. Regular maintenance helps keep your oven in pristine condition. Select the self-clean mode on your Viking oven’s control panel, ensuring the door is fully closed and latched. The cycle may take 2-4 hours, depending on soil level. The oven will automatically lock during cleaning and unlock once cooled. Follow the manufacturer’s guidelines for a safe and effective cleaning process. To initiate the self-clean cycle, locate the control panel and navigate to the cleaning settings. Press the Self-Clean button or selector until the desired cleaning mode appears on the display. Depending on your Viking oven model, you may need to set the cleaning duration, typically 2-4 hours. Confirm your selection by pressing Start or OK. Ensure the oven is empty of food and racks before starting. The door will automatically lock once the cycle begins, and the oven will heat to high temperatures to burn off residue. Properly closing and latching the oven door is crucial for the self-clean cycle. Ensure the door is fully closed and the latch is securely engaged; The self-clean function will not activate unless the door is completely shut and latched. Double-check that all racks and utensils are removed to prevent damage during high heat. Once latched, the door will remain locked throughout the cycle to maintain internal temperature and safety. Always follow the manufacturer’s guidelines for door operation during cleaning. During the self-clean cycle, monitor the progress through the oven’s display. The cycle typically lasts 2-4 hours, depending on soil level. The oven door remains locked to ensure safety and maintain high temperatures. Avoid opening the door during the cycle, as this could disrupt the cleaning process. Once complete, the oven will signal with a beep, and the door will unlock after cooling slightly. Ensure the cycle is fully finished before wiping away ash residue. After the self-clean cycle, allow the oven to cool completely. Use a damp cloth to wipe away ash residue and clean the interior thoroughly. Avoid harsh chemicals. After the self-clean cycle completes, let the oven cool down fully to ensure safety and prevent damage. This allows ash to solidify, making it easier to clean. Avoid opening the door during cooling. Once cooled, gently sweep out ash with a soft brush and discard it. Then, wipe the interior with a damp cloth to remove any remaining residue. This step is crucial for a safe and effective cleaning process. After the oven cools, use a soft brush or damp cloth to remove ash residue. Avoid using abrasive tools to prevent scratching. For stubborn ash, mix water and baking soda to create a paste, apply it to the area, and let it sit before wiping clean. Properly dispose of the ash, ensuring no particles remain. This step ensures the oven interior stays clean and ready for future use. Always follow manufacturer guidelines for safe residue removal. After the self-clean cycle, allow the oven to cool completely. Use a soft, damp cloth to wipe away ash and residue. For tougher spots, apply a paste of baking soda and water, let it sit, then scrub gently with a non-abrasive sponge. Avoid harsh chemicals or abrasive cleaners to prevent damage. Regular wiping helps maintain the oven’s finish and ensures optimal performance. For a polished look, finish with a dry microfiber cloth. Always refer to the manufacturer’s guidelines for specific care instructions. Clean racks with non-abrasive pads and mild detergent. Scrub the oven door with a gentle cleaner and soft sponge. Manually wipe the broiler pan and grid with soapy water and steel wool for tough stains. For the oven door, apply a gentle cleaner like Easy-Off Fume Free Max with a damp sponge. Avoid abrasive materials to prevent scratching. For glass surfaces, mix baking soda and water to form a paste, apply it, and let it sit for 15 minutes. Wipe clean with a soft cloth. Regular wiping after use prevents grime buildup. Ensure all surfaces are dry to maintain clarity and functionality. These steps keep the door and glass clean and streak-free, enhancing visibility during cooking. Remove racks and rack supports before the self-clean cycle. Soak them in hot soapy water, then scrub with a non-abrasive pad. Rinse thoroughly and dry. For tough spots, use a mixture of baking soda and water. After cleaning, lightly coat racks with cooking spray and blot dry to prevent rust and food residue buildup. Regular maintenance ensures racks remain functional and easy to clean, while supporting optimal oven performance and hygiene. This routine keeps your Viking oven in top condition. After removing the broiler pan and grid, soak them in hot soapy water to loosen food residue. Scrub gently with a non-abrasive sponge or steel wool to avoid scratching. For stubborn spots, mix baking soda and water to create a paste, applying it directly before rinsing thoroughly. Sanitize by washing with warm, soapy water and drying completely. Regular sanitizing ensures hygiene and prevents grease buildup, keeping your Viking oven’s broiler components clean and functional for optimal cooking performance and safety. Regularly wipe spills to prevent tough buildup. Avoid abrasive cleaners to protect surfaces. Lightly coat grates with cooking spray for easier cleaning. Maintain racks and ensure proper ventilation for optimal performance. Regular light cleaning helps maintain your Viking oven’s efficiency and appearance. After each use, wipe down surfaces with a damp cloth to remove food residue. For tougher spots, mix baking soda and water to create a paste, applying it to affected areas. Let it sit for 15 minutes before wiping clean. This prevents grime buildup and keeps the oven in excellent condition, reducing the need for deep cleaning. Consistency ensures optimal performance and prolongs the oven’s lifespan. To preserve your Viking oven’s finish, avoid using abrasive cleaners or scrubbers, as they can damage the interior surfaces. Instead, opt for non-abrasive cleaning pads and gentle cleaning products specifically designed for ovens. Harsh chemicals or rough scrubbers can scratch the oven’s walls or racks, potentially leading to long-term damage. Always refer to the manufacturer’s guidelines for recommended cleaning agents. Gentle yet effective cleaning ensures the oven remains in pristine condition while maintaining its self-cleaning functionality. This approach prevents unnecessary wear and tear, keeping your oven looking new for years. Coating your Viking oven grates with a thin layer of cooking spray after cleaning can significantly simplify maintenance. This preventative measure helps prevent food residue from adhering to the grates, making future cleanups easier. After cleaning, lightly spray the grates and blot them dry to avoid residue buildup. Avoid using abrasive cleaners or scrubbers, as they can damage the coating or the grates themselves. Regular coating ensures longevity and maintains the grates’ efficiency while keeping them in pristine condition for optimal performance. This simple step enhances durability and simplifies upkeep. Common issues with the self-clean cycle include initiation problems, excessive smoke, and door latch malfunctions. Always consult your Viking oven’s manual for troubleshooting solutions. If the self-clean cycle doesn’t start, ensure the oven door is fully closed and latched. Check settings to confirm Self-Clean mode is selected. Verify the oven is preheated correctly and no error codes are displayed. If issues persist, refer to the Viking manual or contact support for assistance, as improper initiation could indicate a technical issue requiring professional attention. Excessive smoke during the self-clean cycle can occur due to large food residue or high fat content. To manage this, ensure the oven is clean before starting the cycle. Remove racks and utensils, and wipe up spills to minimize smoke. Use the smoke eliminator feature if available. Keep the kitchen well-ventilated by opening windows or turning on exhaust fans. Monitor the cycle and stay prepared to address any unexpected smoke emissions promptly to ensure a safe and effective cleaning process. Oven door latch issues can prevent the self-clean cycle from starting or functioning properly. Ensure the door is fully closed and latched before initiating the cycle. If the latch malfunctions, check for obstructions or food residue. Clean the latch area gently with a soft brush or damp cloth. Avoid forcing the door open during the cycle, as this can damage the latch mechanism. If problems persist, consult the Viking Use and Care Manual or contact professional support for assistance. Regular maintenance can help prevent latch-related issues. The Viking oven’s self-cleaning feature simplifies maintenance, offering a convenient and efficient way to keep your appliance in prime condition. Always adhere to the manufacturer’s guidelines for optimal results and longevity. The Viking oven’s self-cleaning feature simplifies maintenance by using high heat to burn food residue into ash. Always remove racks, ensure proper ventilation, and avoid abrasive cleaners. Start the cycle by selecting the self-clean mode, closing the door, and letting the oven handle the rest. After cooling, wipe away ash and clean surfaces with gentle products. Regular light cleaning and following the manufacturer’s guidelines ensure optimal performance and longevity of your Viking oven. Adhering to the manufacturer’s instructions ensures safe and effective use of the self-cleaning feature. Proper procedures prevent damage to the oven and surrounding areas, while incorrect practices may void warranties or cause malfunctions. Regular maintenance, as outlined, extends the appliance’s lifespan and maintains its efficiency. Always refer to the Viking Use and Care Manual for specific details tailored to your model, ensuring optimal performance and reliability in cleaning and cooking tasks. Viking ovens offer extensive resources, including the Use and Care Manual, online support, FAQs, and recommended cleaning products for optimal maintenance and troubleshooting. The Viking Oven Use and Care Manual provides detailed instructions for operating and maintaining your oven, including specific guidance for the self-cleaning feature. It outlines essential safety precautions, steps for preparing the oven, and post-cleaning care. The manual also includes troubleshooting tips and recommendations for cleaning products, ensuring optimal performance and longevity of your appliance. Referencing this guide is crucial for understanding all functions, from basic operation to advanced maintenance tasks. Regularly reviewing the manual helps users make the most of their Viking oven’s capabilities. Viking provides comprehensive online support and FAQs to assist users with self-cleaning oven instructions. The official website offers detailed guides, troubleshooting tips, and answers to common questions. Users can access digital versions of the Use and Care Manual, as well as videos and interactive resources. The FAQs address topics like cycle initiation, smoke management, and post-cleaning care. Additionally, Viking’s customer service team is available for direct support, ensuring users can resolve issues quickly and efficiently. This online support enhances the overall ownership experience. For manual cleaning, Viking recommends non-abrasive cleaners to avoid damaging surfaces. Products like Easy-Off Fume Free Max are ideal for the oven door and racks. Avoid caustic or harsh chemicals, as they may harm the finish. For tough stains, a mixture of baking soda and water can be effective. Always rinse and dry surfaces thoroughly after cleaning. Viking also suggests lightly coating grates with cooking spray for easy maintenance. These products ensure your oven remains in pristine condition while maintaining its performance and longevity over time.1.2 Benefits of Using the Self-Cleaning Feature
Safety Precautions Before Starting the Self-Clean Cycle
2.1 Ensuring Proper Ventilation
2.2 Removing Oven Racks and Utensils
2.3 Protecting Surrounding Surfaces from Heat

Understanding the Self-Clean Cycle
3.1 How Pyrolytic Cleaning Works
3.2 Duration of the Self-Clean Cycle
3.3 Role of the Smoke Eliminator

Preparing the Oven for the Self-Clean Cycle
4.1 Wiping Away Loose Debris
4.2 Handling Large Food Spills
Starting the Self-Clean Cycle
5.1 Selecting the Self-Clean Mode
5.2 Closing and Latching the Oven Door
5.3 Monitoring the Cycle Progress

Post-Cleaning Care
6.1 Allowing the Oven to Cool Down
6.2 Removing Ash Residue
6.4 Wiping Down the Oven Interior

Manual Cleaning of Oven Parts
7.1 Cleaning the Oven Door and Glass
7.2 Maintaining Oven Racks and Rack Supports
7.3 Sanitizing the Broiler Pan and Grid
Tips for Maintaining Your Viking Oven
8.1 Regular Light Cleaning
8.2 Avoiding Abrasive Cleaners
8.3 Coating Grates for Easy Maintenance

Troubleshooting the Self-Clean Cycle
9.1 Issues with Cycle Initiation
9.2 Managing Excessive Smoke
9.3 Oven Door Latch Problems
10.1 Summary of Key Instructions
10.2 Importance of Following Manufacturer Guidelines
Additional Resources
11.1 Viking Oven Use and Care Manual
11.2 Online Support and FAQs
11.3 Recommended Cleaning Products